


Blind children hot air balloon with name
Reference: E4818A vibrant hot air balloon design featuring decorative elements like flowers and clouds. The balloon is adorned with playful patterns, and the design includes a personalized name that adds a special touch. A charming bird complements the whimsical scene.
Introducing our Blind children hot air balloon with name, a delightful and whimsical design that features a charming hot air balloon soaring among fluffy clouds and vibrant flowers. This customizable product allows you to add your child's name, creating a unique piece that brightens any child’s room. The enchanting birds that accompany the balloon add a touch of magic, making it a perfect decorative element for any space!
Why this product should be used for decoration
The Blind children hot air balloon with name blind children is not just a decoration; it's a celebration of childhood dreams! This enchanting design inspires imagination and joy, creating a warm atmosphere that encourages creativity and exploration. Incorporating this piece into your decor will transform a simple room into a vibrant wonderland, making it a perfect choice for nurseries or playrooms.
How to install this product
Installing the Blind children hot air balloon with name blind children is a breeze! With easy assembly in just two clicks, you can have this captivating piece ready to delight your little one in no time. Plus, disassembly is just as simple, allowing you to keep the window and surrounding area spotless!
- customizable design
- child's name personalization
- easy assembly and disassembly
- protection from direct sunlight
- privacy when lowered
- improved room decor
- variety of textures

- Light filtering: 100% polyester
- Voile: 70% PVC and 30% polyester
- Blackout: 75% PVC and 25% fiberglass
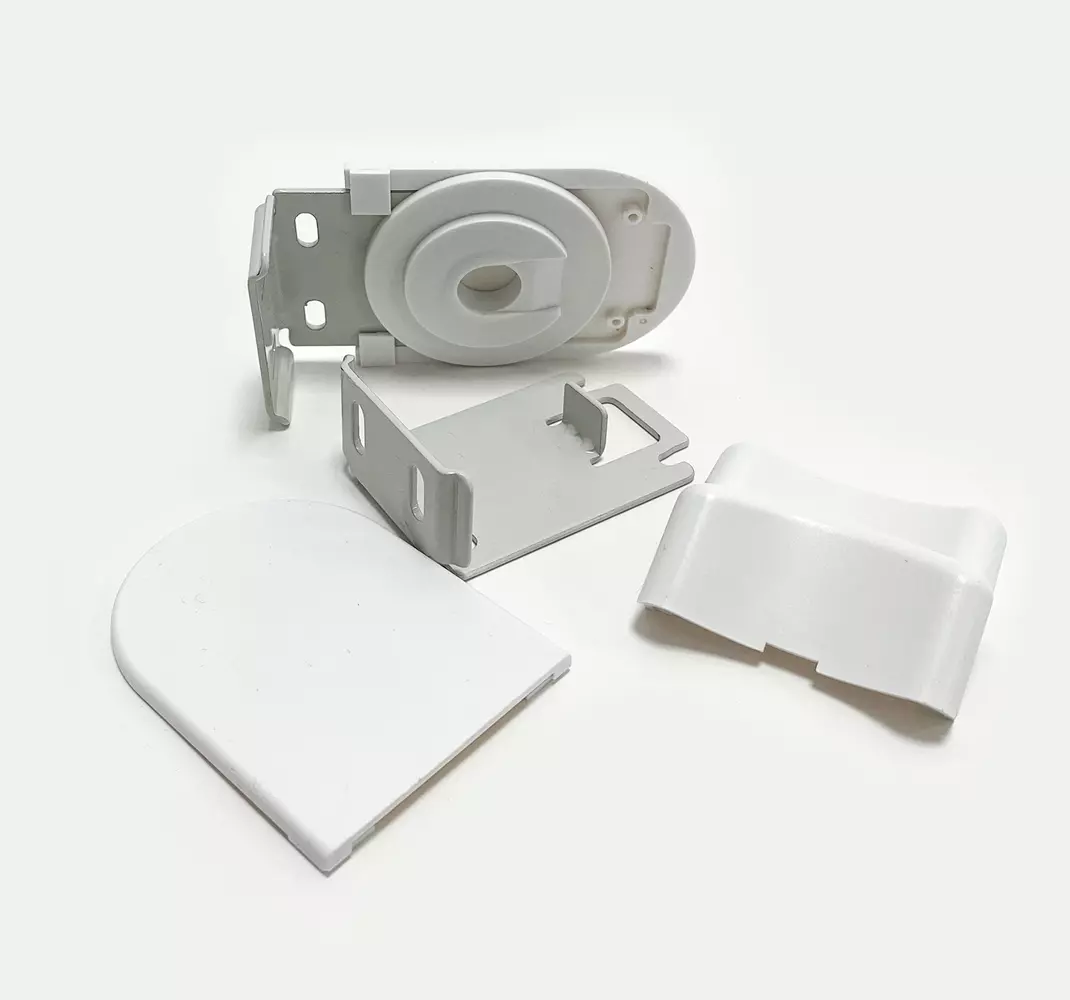
Easy installation: product easy to mount in two clicks
Easy to remove and replace
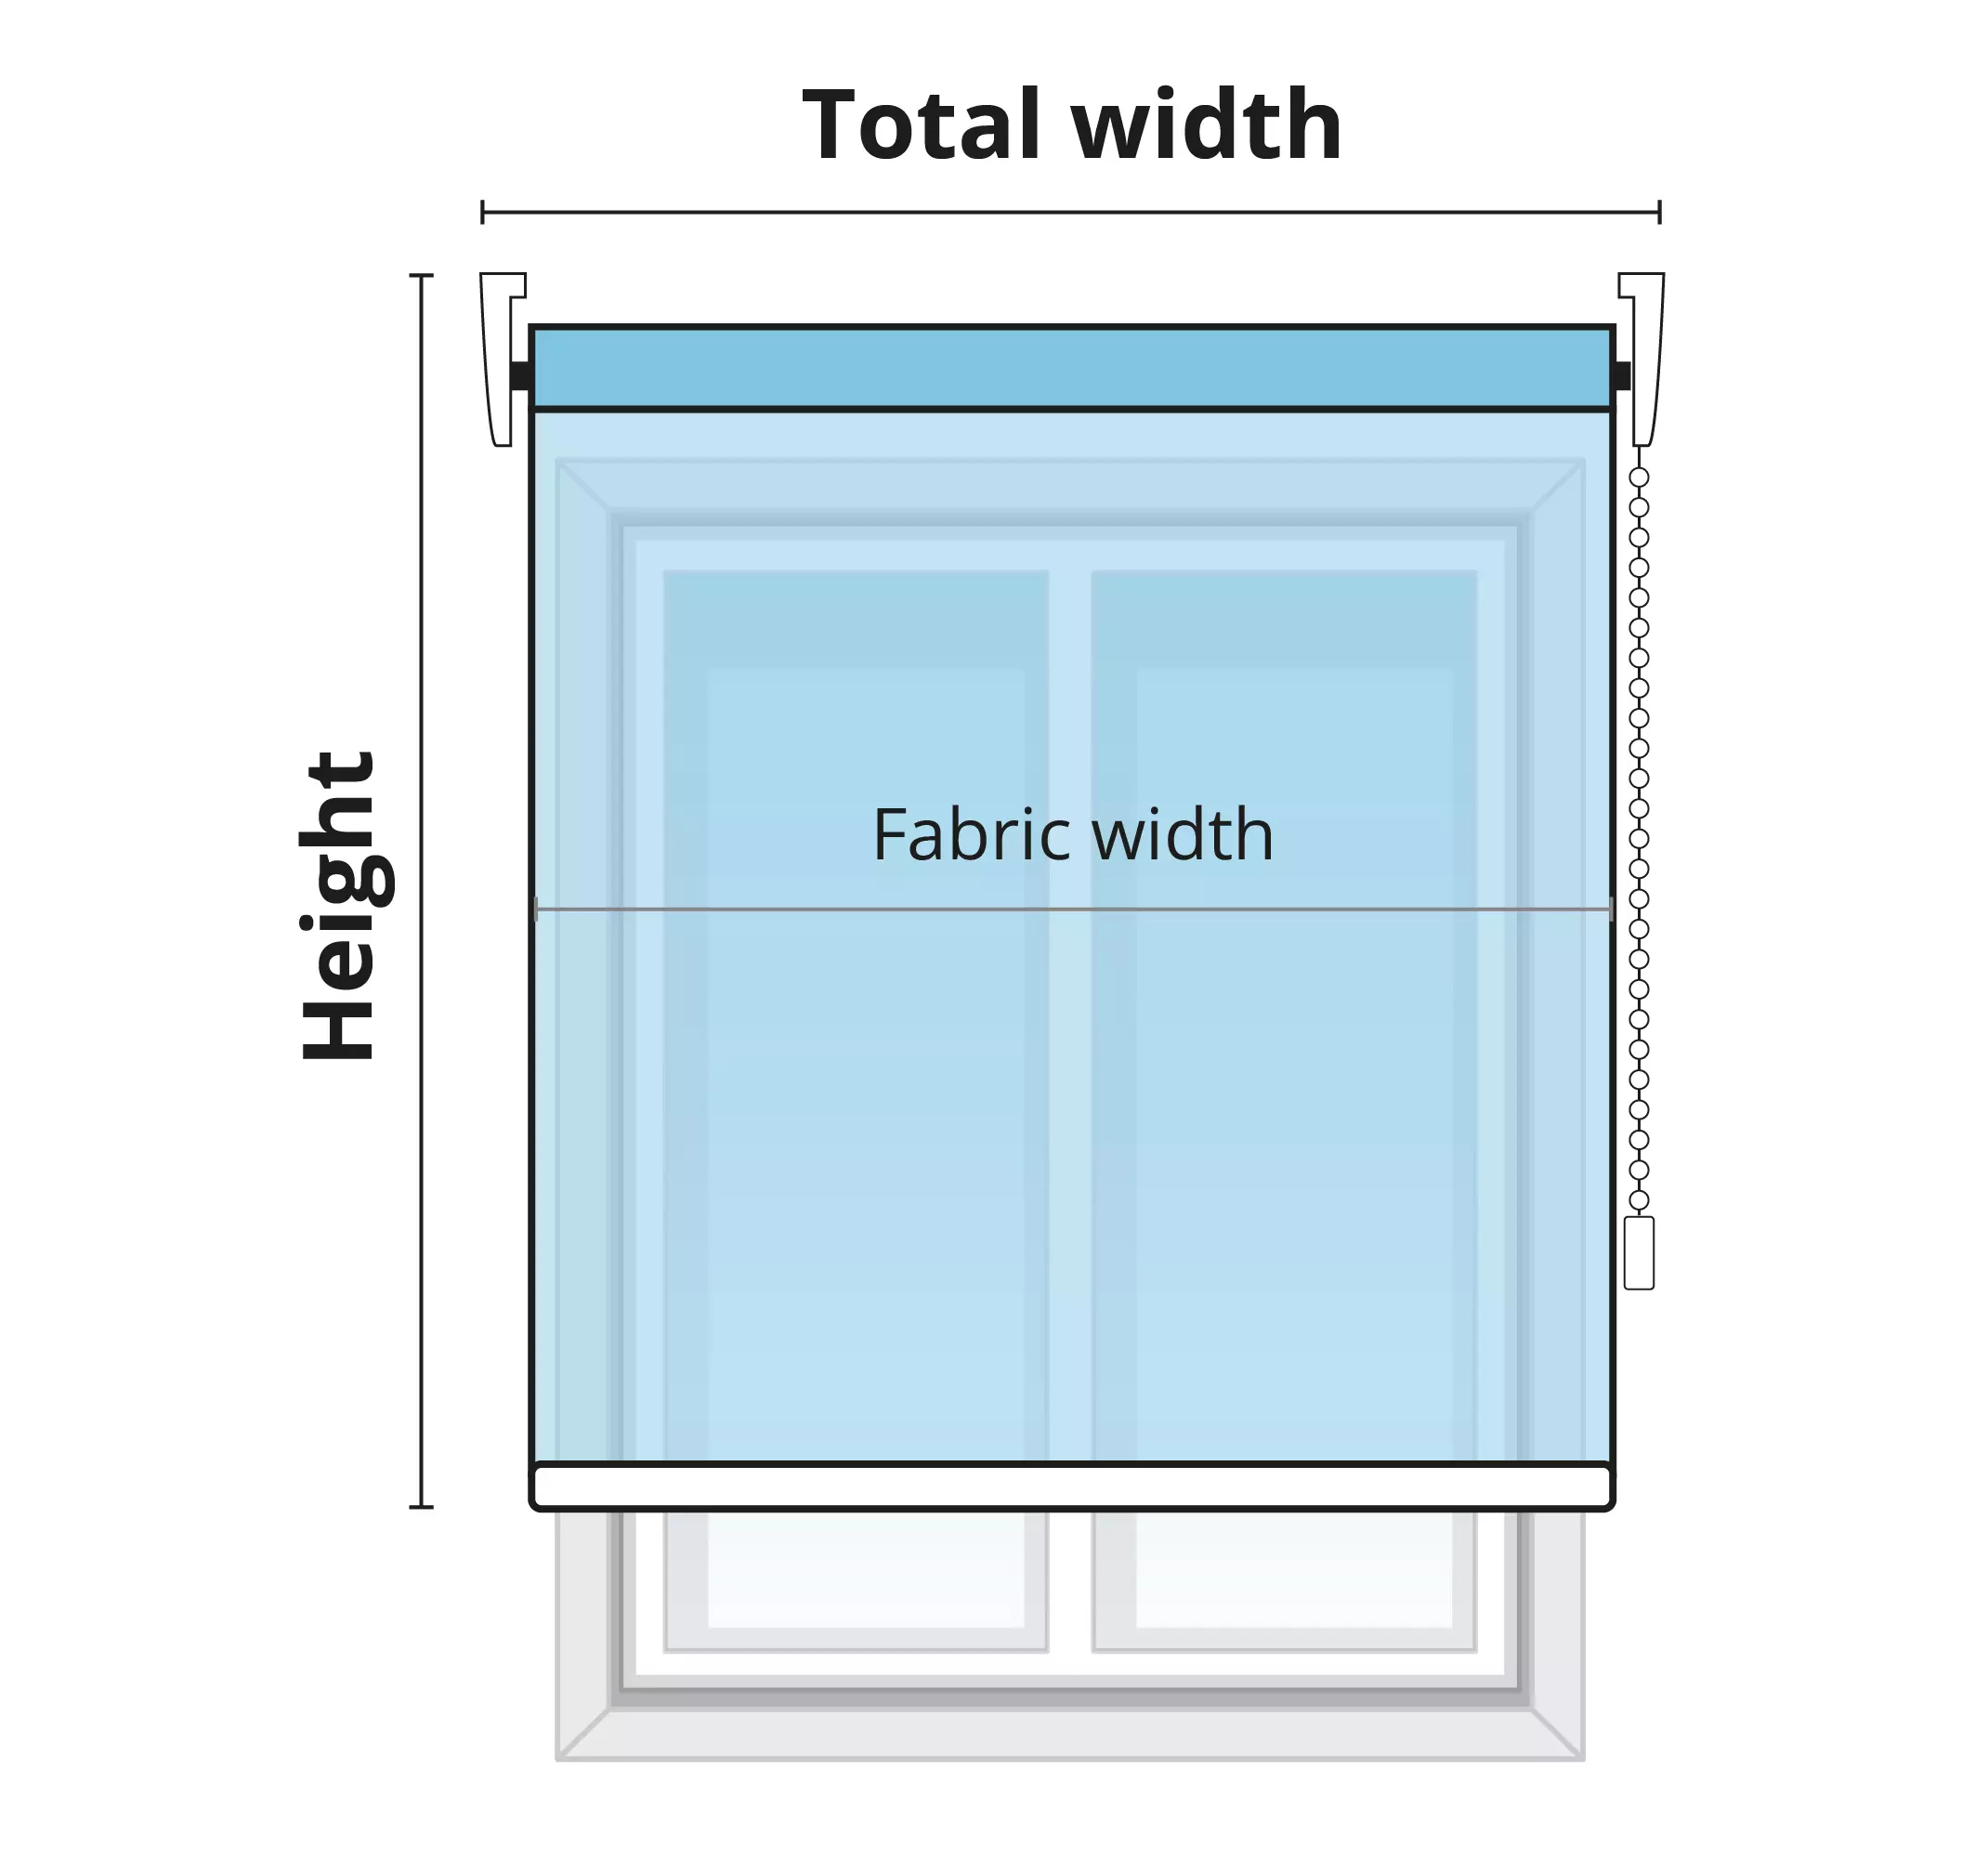
Measurement selection: wall-ceiling or recess installation
- Wall-ceiling: Measure the window and add 5 cm on each side; for example, for 100×180 cm, order a 110×190 cm blind.
- Recess: Measure the recess and subtract 5 mm from the width; for 100×180 cm, order 99.5×180 cm.
Available sizes:
- Width: from 40 cm to 180 cm
- Height: from 40 cm to 300 cm
100% customizable product: if you wish to modify any design element, do not hesitate to contact us.
Mechanism size: 8 cm wide (vertical) and 6 cm high (horizontal)
Available fabric types:
- Light filtering: lets light through while offering privacy
- Voile: lets light through with visibility (ideal for businesses or high floors)
- Blackout: completely blocks light and visibility
Acoustic insulation: reduces noise penetration
Thermal insulation: reduces heat and cold transfer
Available chain and bracket colors: white and black
Chain position: left or right
Safety: reduces UV sunlight penetration
100% custom-made product
Hypoallergenic, antimicrobial (does not accumulate dust), and fire-resistant product
Easy to clean: with a damp cloth and mild soap
Tube diameter: 43 mm / 450 g/m
Weight per square meter:
- Light filtering: 190 g/m²
- Voile: 470 g/m²
- Blackout: 537 g/m²
100% secure payments
Application instructions are available on our website, and with the product you will receive a QR code on the packaging that will redirect you directly to them.
Recommended materials:
1. Ruler/tape measure
2. Spirit level
3. Drill
4. Hammer
5. Screwdriver
6. Appropriate screws/plugs
Installation:
Location and Marking:
Choose the position of the brackets, ensuring that the blind does not hit handles, furniture, or radiators when extended.
There should be the same distance on both sides of the window and enough clearance to open the window with the blind rolled up.
Mark the fixing points of the two brackets with a pencil, using a tape measure and spirit level to ensure they are straight.
Fixing the Brackets:
Drill the holes and, using the hammer, insert the plugs flush with the wall.
Screw the two brackets into the corresponding holes.
Blind Assembly:
Insert the roller blind into the respective slots of each bracket. The system is designed for quick and easy assembly and disassembly.
Express delivery within 72 hours to your home address available.